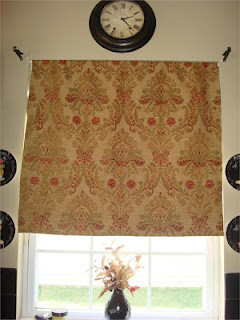
 The kitchen in our new home has lots of light - beautiful evening sun floods through two large windows, two skylights and a half-glass door. It's truly lovely! We repainted the walls when we moved in using Benjamin Moore's China White and it shows off the black trimmed windows and checkered floor really well.
 I have hopes to add some Roman blinds for the winter as I imagine it will get pretty chilly in there with all that glass. A fellow blogger I like to read is Thrifty Decor Chick and she has a great post on No Sew Roman Shades. I'll be keeping an eye out now for the perfect fabric - she makes this DIY look super easy and her photos are very helpful. Happy Home making!
No Sew Roman Shades from Thrifty Decor Chick
Step 1: Cut your fabric to the length/width you need -- for a standard window, a yard is plenty. Hem the sides, making the top a rod pocket using your hemming tape. (I just use tension rods to hang these -- less than $2 each!)
Step 2: Put cup hooks at whatever spot on the wall you want the folds to hang from. You will only need one set of hooks. (One on each side.) I hang mine higher so the treatment doesn't hang too low into the window.
Step 3: Here's where the ribbon comes in. Cut it to the length you want, and hand sew it on at the exact same spot on both sides of the fabric. The length of the ribbon will depend on how far down you want your pleats to hang. For this project, the ribbon was about two inches for the top pleat, about three or four inches for the bottom pleat. I use a button on the front to give it something to really grab on to and it's decorative. (Even though you really can't see the button when done.)
Step 4: Add ribbons at the lengths you want -- in my bay window I wanted three folds, so three sets of buttons/ribbon. In the kitchen window I only wanted two, so there are two sets. Take the ribbon up behind the fabric and hang it on the cup hook, a fold at a time.

Velvet curtains add a luxurious feel to any room with their rich texture and classic appearance. Known for their light-blocking and insulating properties, velvet curtains are ideal for spaces where comfort and style are essential. These curtains provide privacy and create a cozy atmosphere, making them perfect for bedrooms and living rooms. Available in various colors, velvet curtains can complement both traditional and modern interiors, adding depth and sophistication to the decor.
ReplyDelete